
As a photographer and a creative, I am fascinated by processes or methods used by other artists. One artist is Sara Oliphant, artist and creator of Oliphant Studios. Oliphant Studios is located in Brooklyn, New York. Her canvas backdrops are amazing and provided the artistic inspiration I was looking for to make my own.
Artistic inspiration provided by Oliphant Studios in New York
Oliphant backdrops are preferred by famous photographers, architects, theatrical and film industry experts and Hollywood producers. I am able to easily identify her work on movie sets and Hollywood style photography images. Oliphant backdrops are rented out and cost hundreds by the day. The prices for these backdrops are not advertised on the site or the web and are said to range in the thousands for one custom canvas.
Sara Oliphant is my inspiration for a recent canvas photography backdrop I created myself. I am very pleased with the results. I am already planning my next canvas. If you are thinking about making your own photography backdrop, this blog entry is for you and keep reading.
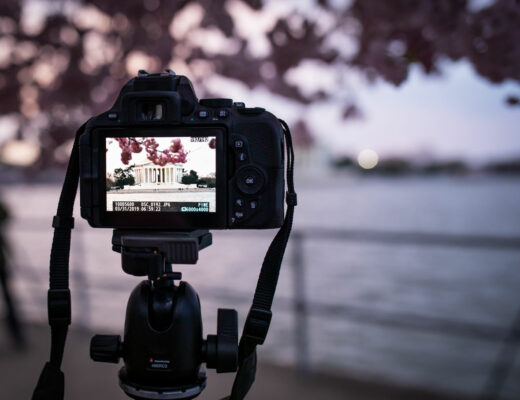
Photography backdrops to purchase on Amazon
You need backdrops if you are a studio portrait photographer or a mom choosing to save money and take family or pet portraits at home. Backdrops are easy to purchase on Amazon. Amazon has perfected shipping just about anything. Do not let the big size of the canvas prevent you from clicking the BUY button. It will save you from hours of DIY labor, back and knee pain, and the mess of painting. Did I mention back pain? If you do not have a large open space for a project like this, I recommend just purchasing online. You need freedom of movement and a place that this project can lay out safely for several days. Did I mention knee pain?
Favorites available online for backdrops are seamless paper, collapsable backdrops, solid vinyl backdrops, printed vinyl backdrops, printed canvas backdrops and muslin backdrops. The list goes on, and you can spend a lot of time searching for just the right backdrop. Considering that I purchased over a hundred dollars of paint supplies, I recommend purchasing a backdrop online if you are not a DIY type of person. The prices quoted on the links provided above are far below the cost of materials that I purchased for my canvas photography backdrop project.
If you are a creative person and want a custom canvas backdrop DIY this project. As a photographer, if you want this level of quality without DIY, you should expect to pay anywhere between $800 to $3,000 (and up), depending on the canvas type, the company or artist. Budget, quality and controlling my own artistic process is why I chose to make my own backdrop.
Make your own Oliphant inspired canvas photography backdrop
This project will be several days of hard work; a true labor of love. It will remain with you and be a personal piece of art you take care of and enjoy. I hung mine up and stared admiringly at it for many hours.
There are lots of variations in going about this project. Do some reading and research online to find the style of backdrop you are wanting to achieve. I wanted something moody, Oliphant-inspired, custom, and elegant with a beautiful drape for portraiture work in my studio.
The materials for this project are not necessarily cheap. The project takes time and lots of patience. Plan to take breaks often to keep your back and knees from hurting. This is a process.
Steam iron the photography canvas
If you purchase a canvas for your backdrop, you will need to steam iron it. The canvas is stiff, and there are deep creases from packaging. Your iron should have the ability to produce lots of hot steam. Put it on the hottest setting with the most steam to remove deep creases in heavy canvas type fabric. If ironing is your happy place, you will enjoy this. I laid my canvas on the floor and ironed for hours making trips back and forth to refill the iron’s water reservoir. Ironing took several hours.
Large and well ventilated space
A large and well ventilated space is required. Your canvas will occupy a large space for several days. Space is a limiting factor for starting this project. Think about children, animals and visitors. A large garage or studio or unused room is ideal. I used my living room after moving all of the furniture out. I was fortunate to have nice weather for several days for opening windows.
The canvas
I purchased Tuff Boy Cotton Canvas Drop Cloth. This is a seamless heavy canvas. I like the larger canvas for poses and set flexibility. I prefer larger backdrops. Many headshot or portrait photographers prefer smaller canvas. These are much easier to work with. It’s your art. Choose what you desire. Be happy and create. You can purchase a similar style canvas at Home Depot in the paint department. Remember, the larger the canvas, the more space, paint and time required.
Floor protection and paint primer coat for your photography canvas
Lay out plastic sheeting under the canvas for floor protection. To allow enough room for walking and paint supplies, the protective sheeting should be larger than the canvas. Tape the plastic sheeting down to the floor with painter’s tape to keep it in place. Put the canvas on top of the plastic sheeting. Tape the canvas down. I use painter’s tape and tape a one inch border around the entire canvas. Use painter’s tape to secure the canvas to the plastic sheeting.
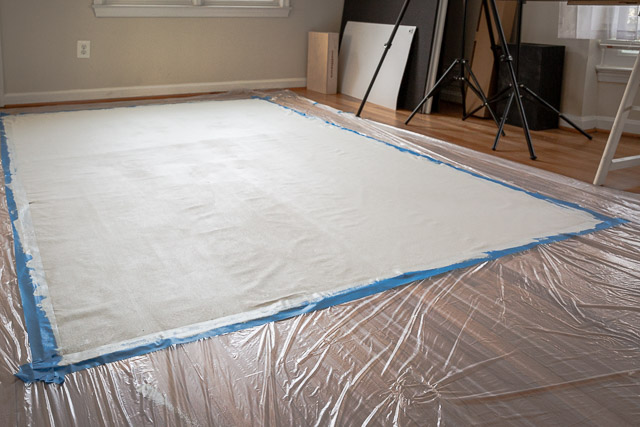
Use a long-handled roller that you can stand up and roll on the primer paint base layer. This will keep you from spending time on your hands and knees using a paint brush. Remember to keep the paint can and the paint tray on the plastic portion of the protective sheeting. One layer of primer is enough on the canvas. I purchased a gallon of Kilz white primer. Let the primer completely dry. Resist the urge to paint more if the primer is not completely dry. It may take one or two days for this layer to completely dry. Be patient. The paint primer coat becomes your paint surface for the backdrop design. The primer seals the canvas and provides the perfect painting surface for your design.
After the primer and the first coat of paint, inspiration takes over. Your canvas becomes whatever you envision with layering and colors. I had a lot of fun on the second and third days as I was bringing this canvas to life. I kept wanting to add more here or highlight an area there. You can make yourself crazy seeing small details and touching up here and there. When you are happy, stop painting.
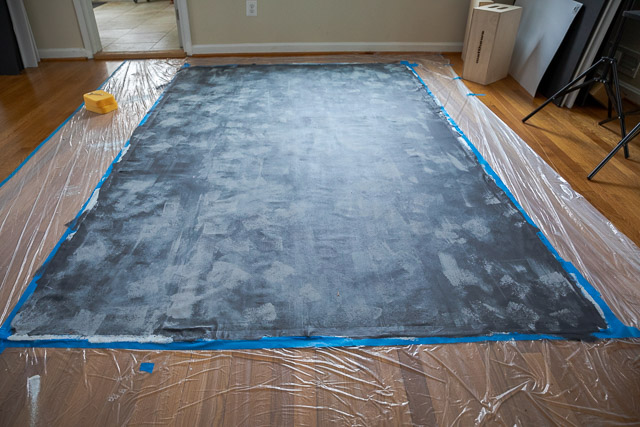
Admiring your photography canvas
Perfection does not exist. You can not mess this up. Have fun and enjoy the process. The morning after my backdrop was completed, I had a cup of coffee in my hand, and I saw the finished canvas lying there on the floor with morning sunlight coming through the window. I stood there admiring the canvas, amazed at how elegant it turned out. I love the drape and heaviness of the canvas. The rich and moody tones are perfect. I am glad I took a few days to focus on this project. I recommend doing this if you are a photographer and a creative soul who enjoys creating artwork.

Hanging the photography canvas
Clamps are really handy for hanging your canvas. I carry clamps in my luggage for hanging diffusion material or backdrops. Clamps are handy in the studio. They make hanging your backdrop simple. I recommend having at least four clamps with you anytime you have your collapsable photography stands with you. This will allow you to pull the canvas nice and straight and clamp the tops and sides.
About Pamela Kay
My name is Pamela Kay. I provide lifestyle and branding photography for busy entrepreneurs, small business owners and unique couples. I book a limited amount of weddings, engagements and elopements each year.
Let images tell your story. Connect and engage with your people. Contact me today!
Let’s schedule a latte date and discuss images that will be right for you. Hope you will Opt In for continued updates and Keep Smiling!
1 Comment
Photographer's Pandemic Advice | Pamela Kay Photography
April 17, 2020 at 6:59 PM[…] class. Practice new photography techniques. Offer free photography for a change to help others. Create your own photography backdrop. Read a book from my list of top […]